I have to stay out of Sally's Beauty Supply... Can't help myself!
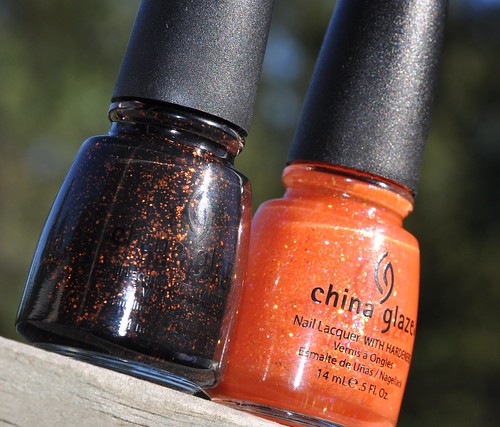
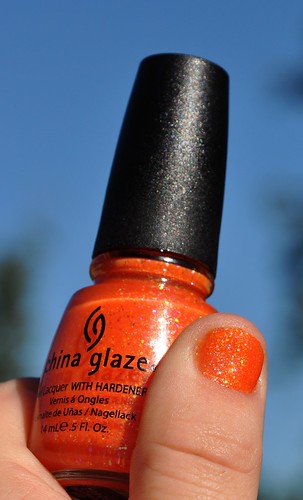
Anyway, I got these two China Glaze nail polishes for Halloween. I love the color orange, so these were right up my ally. I am a glitter freak as well, so double whammy...had to get them.
Both polishes are shown with two coats and a top coat.
China Glaze Dreamsicle (The last one they has as well)
China Glaze Fortune Teller
I love how these look in the sun. Awesome Awesome Awesome!
Wednesday, September 30, 2009
Quick Photoshop Elements post...
I learned a few months ago how to create a texture overlay using Photoshop Elements (PSE). I created a new photo using this technique and wanted to share with everyone.
Here is the original photo
Here is the final product
I used two different overlays to create this effect
http://www.flickr.com/photos/shashamane/3402844138/sizes/m/in/pool-807238@N23/
http://www.flickr.com/photos/hanne_exurban/3887171546/sizes/m/in/pool-807238@N23/
Basically, your putting one picture on top of another to get this effect. In PSE you can adjust how much you see of the photograph by using layers. The textured pictures above can be seen at 100%, which would make them opaque. Or, you can adjust them to say, 50% or so. This way you get a hint of the texture on top of your original photo. If there is a section of the photograph that you do not want to be covered, simply erase that part of the texture.
Flickr has a large selection of groups dedicated to using textures, and some groups that contain user created textures.
Here are two more pictures I created using the same principle.
Snoogle...she is a cutie :)
Abi :)
Sunday, September 27, 2009
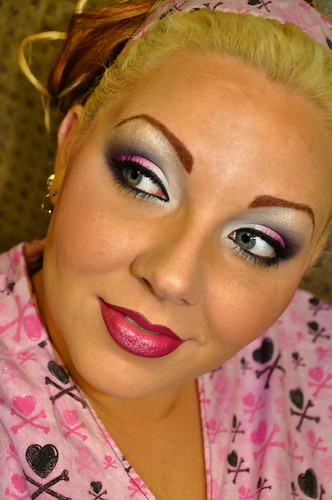
Smokey Pinks FOTD
My FOTD which I am calling Smokey Pinks...
What I used
Face:
-Smashbox Primer
-Estee Lauder Double Wear Liquid Foundation, color Fresco
-Estee Lauder Double Matte Oil Control Powder color Medium
-BFTE Loose Mineral Foundation Powder, color Medium
-Rimmel Bronzer
Eyes:
-Urban Decay Primer Potion
-Coastal Scents 88 Palette
-Kryolan White as a base
-Gel liner in Black
-Urban Decay 24/7 liner in Zero
-Maybelline Volum' Express Turbo Boost Mascara, color Black
Cheeks:
-Nars Angelika
Lips:
-Urban Decay lipstick in Jilted
-Calvin Klein lipstick in Mesmerize
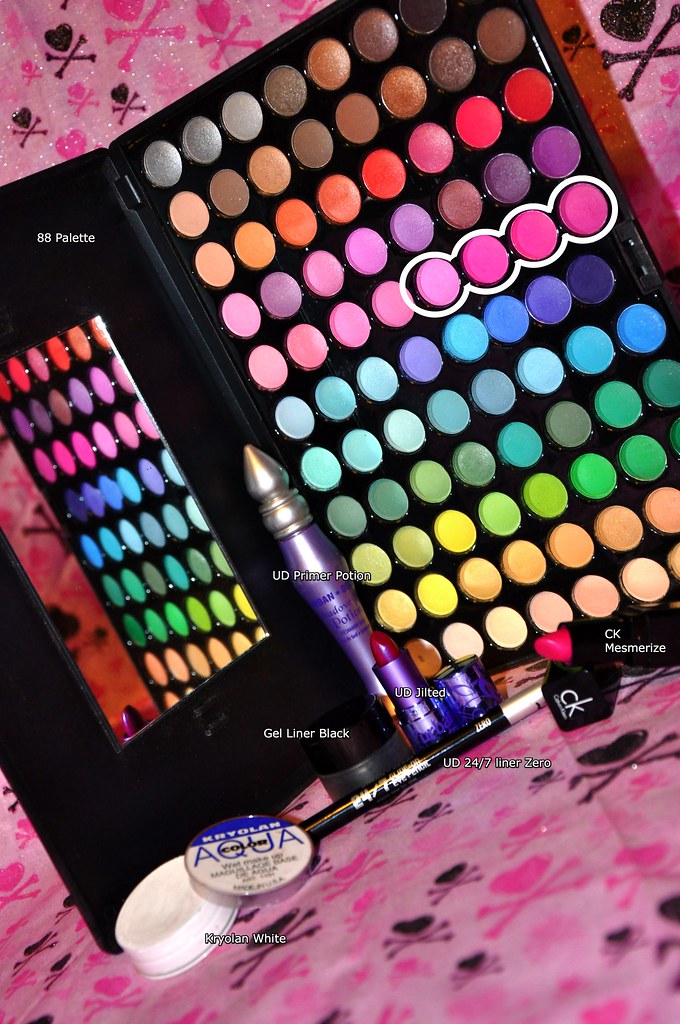
1. Apply UDPP over entire lid
2. Apply Kryolan Aqua Color in White over entire lid. This makes the light pinks really be able to stand out. (Use this wet)
3. Use the darkest pink, circled in picture above, on the outside edge of lid. Use next lightest pink beside that, and so on... Blend the pinks together until they make a seamless transition from light to dark. I blended the lightest pink right at the midpoint of my lid, leaving the inner 1/3 white.
4. Use the white from the 88 palette on inner 1/3 of lid and under the eye as well.
5. Use the white on the brow bone for a highlight.
6. Cut the crease with black from the 88 palette and blend up.
7. Under the eye, the outer 2/3, I used black and blended to make it look smokey.
8. Use UD 24/7 liner on water line.
9. Finish with gel liner and mascara :)
On the lips I used UD Jilted on all of my lips. except the center part of the lower one. I put CK Mesmerize on the center of my lower lip and blended them together a little.
I hope everyone enjoys my look! :) Comments always appreciated!
Any questions about where to get any products, just ask me! :)
Sunday, September 20, 2009
Butterfly & Alantis, Look for the day....
I have been using my Beauty From The Earth minerals this week. I wanted to do something different and I wanted to wear some colors that I hadn't worn before. I think it came out well. :)
Butterfly is a yellowish green that is very shimmery. I thought it was just a muted yellow, but it really pops once you put it on.
Atlantis is a very blue purple...if that makes any sense. I like it a lot!
I will let the pics speak for themselves
Here is a list of everything used
Face
-Smashbox Primer
-Estee Lauder Double Wear Liquid Foundation, color Fresco
-Estee Lauder Double Matte Oil Control Powder color Medium
-BFTE Loose Mineral Foundation Powder, color Medium
-Rimmel Bronzer
Eyes
-Urban Decay Primer Potion
-BFTE Mineral Eyeshadow, color Butterfly inner half of lid
-BFTE Mineral Eyeshadow, color Atlantis outer half of lid
- white shimmer loose shadow on brow bone
-BFTE Gel Liner, color Black
-Maybelline Volum' Express Turbo Boost Mascara, color Black
Cheeks
-Nars Blush, color Orgasm
Lips
-drug store lip liner, color Cappuccino
-Urban Decay's Lipstick, color Naked
Drawing a Dachshund... Snoogle to be exact
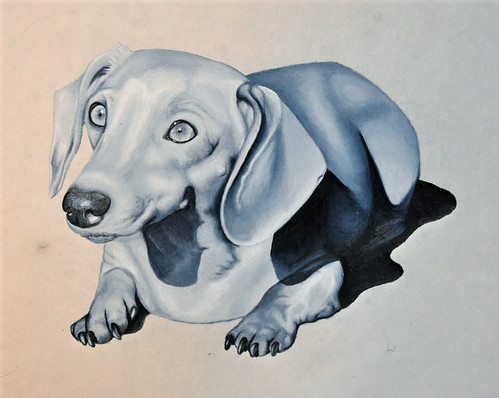
As I have stated previously, I am an artist. I love to paint, draw, sketch, etc. I just wanted to share a recent drawing of mine, which I turned into a video for youtube and flickr. I usually do commissions for other people, so I wanted something for myself. This is my first attempt at compiling a video, and I was quite pleased with the outcome.
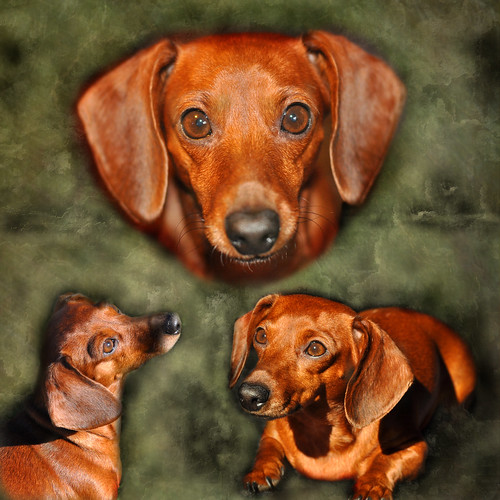
The photo I used as a reference...
Here is a picture of the drawing...
And a time progressive video... Not live drawing, just pics at certain stages in the drawing process.
The photo I used as a reference...
Here is a picture of the drawing...
And a time progressive video... Not live drawing, just pics at certain stages in the drawing process.
Wednesday, September 16, 2009
BFTE Shadow Review
I am a bad blogger obviously... :( I will have to make a better habit of updating...
ANYways....
I wanted to do a quick review of some Beauty from the Earth mineral eye shadows. I wore Chocolate, Honey, and Canyon together. All I can say is AMAZING! My favorite is Honey. This color is a beautiful beige, shimmery, khaki-like color. Chocolate is exactly as it sounds, a rich, deep brown. This color is also very shimmery and reflective. Canyon is a matte mineral shadow. Most matte mineral shadows can be OK or just plain blah. I do have to say though, Canyon is a very smooth applying, soft, full coverage color. I can also say I have never been disappointed in any shadows from BFTE, shimmer or matte. :)
I also love the loose mineral foundation. I apply it on top of my liquid foundation with the super soft ultimate kabuki brush from BFTE. ( I could write a separate entry just on the brush! ) I always get tons of compliments on my skin when I wear it. I also wear the loose mineral foundation alone on occasion. My skin couldn't look more radiant! I love the soft, smooth appearance my face has when I wear it as well.
They also are selling new pot gel eyeliners. I am wearing the liner in the pic below. I believe the gel liners are applied best with an angled liner brush.
What can I say? I am a totally BFTE fan. :)
Anyone interested in some very beautiful mineral eyeshadows, mineral foundation, blush, brushes, etc, please visit www.beautyfromtheearth.com
Subscribe to:
Posts (Atom)